Joining SouleMama for This Moment today.
Pin and Purl
Friday, 9 November 2012
Wednesday, 7 November 2012
Etsy favs
I was looking through my Etsy favourites today and I had to laugh at myself. Can you see what a jumbled ball of yarn I am? A hot mess of contradictions, for sure. Am I a hippy or a gun-toting cowgirl? Political or whimsical? Fashionista or tomboy? I've never seen less of a common thread.
I guess my theme is Eclectic. I like that.
Crocheted stone (Monicaj). Butterfly stockings (SideShowAnatomology). Feather hair clip (francisfrank). Leather quick release key hook (MercyLeatherWork).
Tuesday, 6 November 2012
things olde
Yesterday's post got me thinking about all the old things we have around here; how beautiful I find them, how well they are made, and how good I feel about being able to give them a home here. I think a lot of people feel that antique-lovers are collectors of junk. I am neither. I despise clutter. I love clean, open space. I love to purge.
I see it another way. People who like to repurpose old things produce less junk. They consume less. They buy less mass-produced garbage from big box stores. That's how I try to be, anyway.
I don't want to offend anyone who doesn't like old things, certainly. I'm not saying everyone who doesn't have a wooden highchair or an old farm table is a consumer whore.
I just really believe that things were made better in times past, and that finding those things and giving new life to them, instead of buying new stuff, is very satisfying to me.
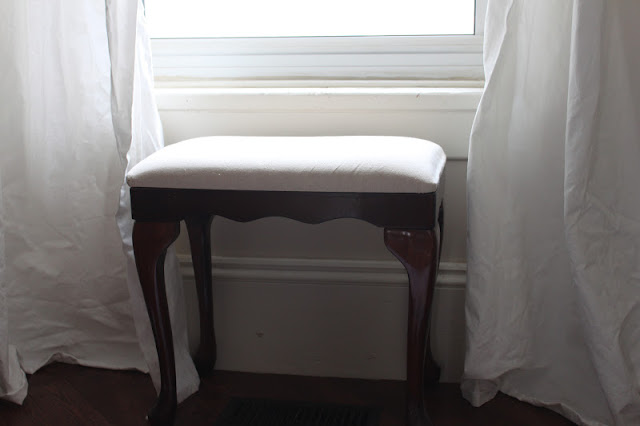
I went around the house and took some shots of some of our old things, mostly to put off doing the dishes but also because I thought you might like to see some of these beautiful things we are caretaking until hopefully someone else can continue to look after them someday.
Monday, 5 November 2012
Butcher block island
This is what the guts of a 19th century middle-class house look like. I took this shot looking across the back room of the house and out into the “garage”, or the “scab” as we like to call it. That doorway is now drywalled shut, and the scab slated for demolition (if a good stiff wind doesn’t do the job first). This used to be a mud room of sorts, with horrible 1970’s wallpaper and peeling linoleum floors. It’s the first section of the house we have renovated and it is now a bathroom/laundry room. One day I will do a before and after post so you can see how it looks now (and how very talented my husband is at renovating a room with no straight edges in it whatsoever).
When we first gutted this room, the first thing we noticed (besides all the interesting and worrisome things you find when you gut a 140 year-old room) was how much better it looked with the ceiling opened up. It made the room feel so much bigger, so we decided to keep it that way. The beams you see running across the open space where the ceiling used to be were cut out, but we kept them in hopes of repurposing the fantastic old wood into something new.
Flash forward a year, and we looked at that pile of antique lumber that had been sitting in the corner of our dining room ever since and decided it was finally time to put together the butcher block island we’d been talking about turning it into.
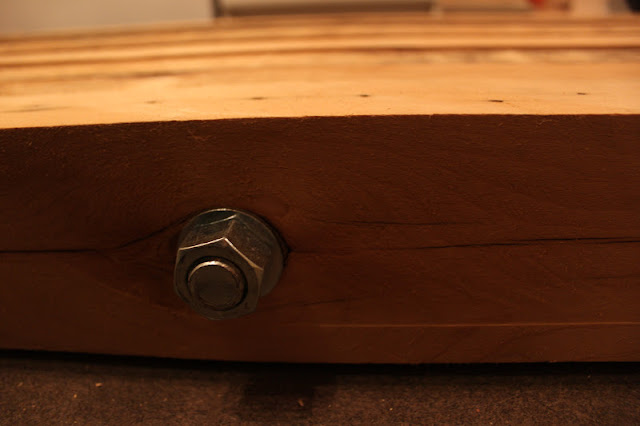
Ian cut up the lumber and trimmed it all down to the size we wanted, and then he patiently explained to me how to measure and drill four holes through each piece, which I did, in my slippers I might add, on the kitchen floor. We then threaded four industrial steel rods through each beam and bolted them tightly together.
This week I’ll sand and finish the whole thing with food-grade sealant. We are thinking of suspending it from the ceiling instead of giving it legs, which has me scratching my head but hubby says he can do it and I trust him.
I must say that over the last few years, I have developed a love for old things. Not just antiques, but old raw materials too. I love running my hands over this wood, feeling the holes where the handmade iron nails used to be, imagining what my community looked like when this wood was first milled down the street at the pond. I like the sense of stewardship that caring for and repurposing old things gives me- the sense of history and connection. It means that building and crafting things never goes as smoothly as it would with all new materials; things break or surprise you in different ways, parts don’t fit or can’t be replaced, and sometimes it ends up costing you more to retrofit something old than it would have to just buy it new. But when it works, I just love it. There is so much beauty, pride and craftsmanship in my old things that give me a little burst of joy every time I look at them. I strive to craft my home around the saying: “Have nothing in your home that you do not know to by useful or find to be beautiful”. More often than not, I find that the old fits both those bills better than the new.
Friday, 26 October 2012
Thursday, 25 October 2012
stuffing pie
I love taking basic recipes from Joy of Cooking and using them as a jumping-off point for something new. Last night I thought I'd have a go at a pot pie; the only pies I've ever attempted before are apple and blueberry.
The butcher had yummy honey garlic sausages on special today, so I had some of those, and all the typical roast chicken veggies on hand.
The recipe I took from Joy was the drop-biscuits that I used for the crust. It turned out great, if I do say so myself. I asked Ian what he thought and he said (with his mouth full so I'm taking it as a compliment), "It tastes like stuffing." Stuffing pie!
I do so love that these chilly nights mean I can get back to making comfort food again.
Here's the recipe- enjoy!
~ Stuffing Pie ~
filling:
1 carrot, diced
1 onion, diced
2 ribs celery, diced
1/3 cup peas
2 small potatoes, diced
3 good sausages, diced (remove casing if you want)
chicken stock
italian herbs
salt and pepper
olive oil
drop-biscuit crust:
(adapted from Joy of Cooking)
1 3/4 cups flour (I used bread flour)
1/3 cup butter, chilled or frozen
1 tbsp baking powder
1 cup milk
1/2 tsp salt
italian herbs
Saute the veggies (except the peas) and sausages in olive oil.
Add chicken stock a little at a time, like you would if you were making risotto. Keep adding and reducing, stirring often, until a thick sauce forms.
Add peas and cook just a minute longer.
Add herbs, salt and pepper to taste.
Fill a pie plate with the filling (there is no bottom crust)
Combine dry ingredients for crust and grate in the butter with a cheese grater. Work the butter in with your fingers, then add the milk and stir to form a wet dough. Pull off in little balls and cover the filling to form the drop-biscuit crust.
Cook in a 450 degree oven until the biscuits are puffed up and golden brown on top, and the filling is bubbling up through the cracks (about 20 minutes).
Serve hot. Makes one 9" pie.
Wednesday, 24 October 2012
cutting my canning teeth
So I decided that this would be the year I would teach myself to preserve food. I'm not ready to invest in a dehydrator or vacuum sealing machine yet- i just don't have the space for the equipment or the food frankly, but a little bit of canning to get my feet wet and put a little of the summer harvest by, that I could handle.
The biggest batch I made of anything was five jars of raspberry jam. I also did four jars of roasted tomatoes (down to one already!), two jars of vanilla pear butter, and one jar of roasted garlic. The tomatoes were done using the water bath canning method. The pears and jam were cooked so I just canned them right into sterilized jars and that was that. The garlic had to be frozen.
I made lots of mistakes and got to try a couple of different methods- but everything tasted yummy! It was all way easier than I had worked myself up to believe, actually. I used pretty simple recipes- the pear butter was the most complicated but I'm told it worked out well (I gave it all away before I had a chance to taste any).
Over the winter I'm planning to keep track of what I buy the most of, in terms of things that I could can next year. I know right off the bat that all things tomato will be top of the list. Pasta sauce, salsa, and lots of straight up roasted whole tomatoes. My garden tomatoes did well this year, although they were slow to start as my yard is pretty shady. I didn't preserve any, though. We couldn't resist eating them all fresh and straight off the vine. I had six plants that grew to about 6 feet tall, and next year I think I'll aim to triple that.
Pickling is something I didn't get into this year; I missed the farmer's harvest and our plants produced them too slowly to keep them fresh until there were enough to pickle. So we just enjoyed those fresh, too. Lots of cucumber, basil and tomato salads were enjoyed!
I don't have the yard space or the house space really, to put up a winter's-worth of preserved food right now, so the time we spend in this place is a time of learning for me. Learning how to grow and how to preserve, so I am a little better prepared when we eventually find the place we're meant to be and I can earnestly dig into my dream of food independence. I do so long for the day when I can have all my family over for Christmas or Thanksgiving dinner, and give thanks for every single thing on the table being raised, grown, and harvested from our own land with our own hands.
But for now, I have five very pretty jars left sitting in my cupboard that have no labels, logos or ingredient lists on them, and that's enough to make me smile.
Subscribe to:
Comments (Atom)


